"Mr. Ed" and I brought a tremendous amount
of baggage during our relocation On Crooked Creek!
One item that made our journey quite nicely
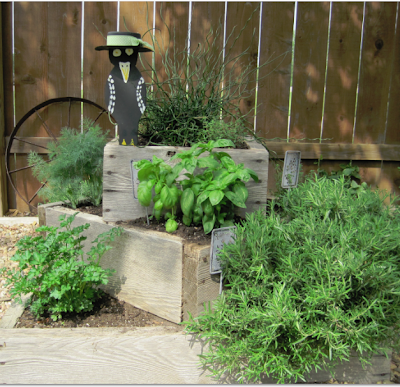
was the Herb Planter Box made by "Mr. Ed"!!!
 |
Herb Planter Box May 2010.
Chartreuse and Eggplant hued Sweet Potato Vine. |
* * * * * * * Instructional DIY Information * * * * * * *
Herb Companion April / May 2001
A Three ~ Level Planter
Allison Witt, a gardener and
building
whiz
at Cleveland Botanical Garden,
designed
this compact three~level,
easy~to~make
herb planter. She chose
cedar
for the planter because it is
weather
resistant. The finished planter
measures
3 by 3 feet and is about
2 feet high. It provides nine planting
areas
for a total planting area of
9 square feet. Material cost less than
$50.
Materials:
4
lengths of cedar, 34 ½ X 8 X 2 inches, lower frame
4
lengths of cedar, 24 X 8 X 2 inches,
middle frame
4
lengths of cedar, 16 ½ X 8 X 2 inches, top frame
24
galvanized deck screws, 3 inches long
Electric
drill with 1/8 inch bit
Directions:
1) For each frame, stand two boards
on the edge at right angles to each other.
Butt the end of the left~handed board
against the side of the right~handed
board leaving no overhang.
Drill two 3~inch pilot holes through the
right~hand board and into the left~
hand board. Screw the boards together.
Align the end of a third board against
the side of the free end or the left~hand
board ( it becomes the new right~hand
board) and fasten. Attach the fourth
board in the same way. Screw the fourth
board to the first board ( the original right~
hand board).
2) Prepare a level site for the planter.
Remove any turf from the area and turn
the soil to a depth of a foot. Pulverize the
clods and work in compost. Rake the soil
smooth and firm it lightly. Set the lower
frame on the prepared soil.
3) Fill the frame to the top with 3 parts
soil~less mix blended with one part compost.
Firm it, water to settle the planting mix,
and more mix to fill the frame and firm again.
4) Place the middle frame diagonally on the
lower frame. Fill with planting mix as for
the lower frame.
5) Place the top frame diagonally on the
middle frame and fill with planting mix
as for the two other frames.
6) Pot up each pocket with herbs.
* * * * * * * * * * * * * * * * * * * * * * * * * * * * * * * * * * * *
 |
Herb Planter Box
May 2011 / 2012.
Sage. |
 |
Herb Planter Box May 2013.
Big Twister Rush. |
Through the years, the plantings in the top
of the Herb Planter Box have changed,
but the remainder of the selection of herbs
stays fairly the same from year~to~year.
 |
| Sweet Basil. |
Sweet Basil is my favorite herb!!!
Fresh from the Herb Garden with sliced tomates
is my all time favorite way to use Sweet Basil!
It is a key ingredient in my homemade marina sauce
and often found in any salad On Crooked Creek!
 |
| Onion Chive. |
Onion Chive, until recently, was my all~time favorite herb.
I adore the flavor it brings to herb butter
and chicken and pork dishes!!!
As you notice in the empty Herb Planter Box above,
Chive 'Winters over' well when protected from the elements.
 |
| Fernleaf Dill. |
Next, is Fernleaf Dill and Bouquet Dill!
Fernleaf Dill gives an amazing great flavor boost
to Chicken Salad and my homemade Chicken Tenders!!!
 |
Bouquet Dill
with its glorious yellow blossoms. |
Bouquet Dill is a lovely plant,
but short lived here on the Prairie.
Caterpillars, as they prepare their chrysalis,
can devour an entire plant in a single day!
 |
'Munstead'
English Lavendar. |
 |
| Harvested and dried Lavendar. |
'Munstead' English Lavendar, grown entirely for its aroma,
On Crooked Creek. Harvested and hung to dry makes an
enjoyable herb year 'round.
 |
| Flatleaf Italian Parsley. |
Flatleaf Italian Parsley is a staple herb
for adding flavor to pasta and salads!
 |
| German Thyme. |
Two types of Thyme
adorn the Herb Planter Box On Crooked Creek.
German Thyme for enhancing meat dishes
and Lemon Thyme for sweetening cold drinks and pastries!
 |
| Rosemary. |
The final herb is Rosemary.
Grown entirely for its aroma, nothing more.
Another of the herbs that 'Winter~over' quite nicely!
 |
Northern Side
Herb Garden 2013. |
The Herb Planter Box
sits atop a Garden area filled with River Rock
and surrounded by interlocking concrete pavers.
Upon arriving On Crooked Creek,
this area held water after Spring and Autumn rains.
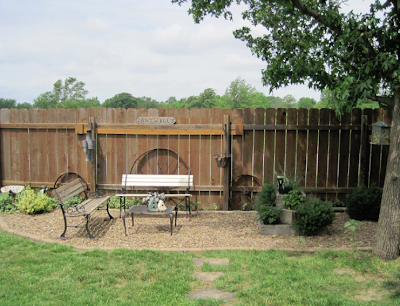 |
Southern Side
Herb Garden 2013. |
The largest of the six Gardens On Crooked Creek
the Herb Garden is also an outdoor sitting area.
Two park benches and an iron coffee table
are a nice place to rest in the early morning
or late evening as the sun begins to set.
(Trying desperately to get "Mr. Ed" to paint the second bench!)
Beginning at the Southern end of the Herb Garden,
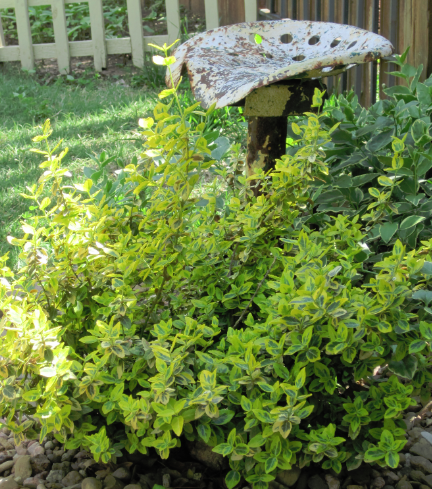
is a vintage tractor seat surrounded by vinca vines
and an emerald 'n gold euonymus bush.
Three wagon wheels help contain the vines
within the background edging of the Herb Garden.
Amidst the boxwood, bird bath and vintage patio chair,
is "Mr. Ed's" resting spot
while he's attending to his 'Master Gardener' chores.
Calm, serene, tranquil settings of the Herb Garden. . .
are guarded hourly by the handmade Dragoon Soldier!
I'm anxiously awaiting the arrival
of our Brunch Bunch Ladies for an upcoming
Garden Tour Tea in early June.
 |
A resident squirrel that frequents the feeder,
affectionately named Fred! |
After two years of arid, drought conditions here on the Prairie. . .
On Crooked Creek,
"Mr. Ed" and I are throughly enjoying
all of the lush green surroundings!
Until next time. . .