The simple pleasures of home shine brighter
when the spirit of God intertwines our hearts
with His gentle Joy.

Tuesday, February 28, 2012

I'm A Basket Case!

Confession time. . .

I'm a b a s k e t case!


The "dream home" was designed, built and decorated in  the 90's. I had open spaces above the Country Kitchen oak cabinets which I filled with b a s k e t s of every shape and size!


I adore their hues, shapes and textures! Fun and functional!


Used for celebrations, picnics and seasonal decorating. . .each b a s k e t has its own purpose.


With a galley kitchen, here on the Prairie, and limited space. . .  my b a s k e t collection was re~located to the lower level On Crooked Creek.


While giving Studio One a new look earlier this year, I consolidated my b a s k e t collection atop the primitive cabinet.


Soon it will be time to bring this vintage Easter b a s k e t to the upper level.


I'm am such a b a s k e t case

. . .how about you?


Until next time. . .


Monday, February 27, 2012

It Is NO Secret!

It is no secret ~

I l o v e S u n f l o w e r s!


So ~ o ~ o . . .
after the Christmas decorations were put away. . .
I put together this S u n f l o w e r tabletop vignette!


My son and daughter ~ in ~ law gifted me with four (three shown here) S u n f l o w e r trays. I adore them!!!


At Christmas, "Mr. Ed" gifted me with a new addition to my Willow Tree Collection ~ Brothers!


My red Party~Lite collection fills out the right side of this
S u n f l o w e r vignette!


Although a pricey purchase, I was drawn to the heft and detailing on the base of this footed bowl.


The slender curvature of these candlesticks brings movement to this vignette.


The glass s u n f l o w e r dish has exquisite detail and mimics a piece of stained glass! I filled the footed bowl with bronze and gold orbs purchased for $1 each at a local antique shop.


Can you tell which orb is my favorite???


Although change is constant On Crooked Creek ~ perhaps this S u n f l o w e r vignette could linger awhile.


Until next time. . .


On Crooked Creek will be joining our sweet hostess, Marty for Table Top Tuesday @ A Stroll Thru Life. Be sure to visit and be inspired for some fabulous ideas to make gorgeous vignettes in your own home!

Sunday, February 26, 2012

Blossom by Blossom. . .

Blossom ~ by ~ blossom. . .Spring evolves.
It doesn't happen all at once. . .
but Spring is evolving On Crooked Creek!


Temperatures on the Prairie reached 60 degrees . . .
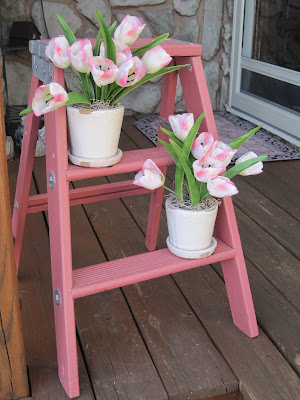
so this afternoon was the perfect time to add a touch of Spring to the front porch On Crooked Creek!


The greenhouse is being erected @ the local marketplace. However; it will be a few weeks until the arrival of real tulips and herbs.


Faux fushia and white tulips ~ and rosemary ~ will suffice for the next few weeks!


Yes. . .Spring is evolving On Crooked Creek!


Blossom ~ by ~ blossom.


Until next time. . .
Thursday, February 23, 2012

A Man's Cookie?

A Man's Cookie?


Perhaps...
but this just happens to be a favorite cookie of mine!
Why?
Let me count the ways!!!


#1)An Oatmeal Cookie that doesn't contain cinnamon in the ingredients!
#2)Doesn't use "room temperature" butter, so you can whip up a batch at a moments notice!
#3)Uses chopped pecans. . ."Mr. Ed" loves anything with pecans!
#4)Made from regular ingredients found in most cupboards or pantries!


This recipe makes a generous amount of the
best oatmeal cookies e v e r!


 I made  my special co~workers 1/2 dozen each.
Why?
Just to show my gratitude for all their help and kindness!!!


"Mr. Ed" helped tie them up in their "treat bags"!


On Crooked Creek ~ a full plate of A Man's Cookie!


Cookies for eating. . .
cookies for sharing. . .
cookies for savoring another day in the freezer!


A Man's Cookie
1 cup granulated sugar
1 cup brown sugar
1 cup Crisco Shortening

2 eggs
2 teaspoons vanilla flavoring

2 cups flour
1 teaspoon baking powder
1 teaspoon baking soda
1 teaspoon salt

2 cups oatmeal
1 cup flake coconut
1 cup chopped pecans

In a large mixing bowl, cream together the sugars and the Crisco.

Add the eggs and the vanilla flavoring.

Sift together the dry ingredients and add to the creamed mixture.

Stir in the coconut, oatmeal and pecans.

Drop by spoonfuls on an ungreased cookie sheet.
Bake in a 375 degree oven for 10 ~ 12 minutes.

Makes: 48 cookies

A Man's Cookie?
Perhaps. . .
I'll let you decide for yourself!


Until next time. . .

Saturday, February 18, 2012

Saturday @ Studio One!

Our Church is hosting a reception in honor of one of our Chancel Choir members. Our member is moving and therefore will no longer be attending Choir practice on Wednesday evenings.


So~o~o. . . my dear friend( and Choir member) sent me an e~mail asking if I would make one of my Handmade Cards with a Vintage Flair for the honoree.


The only thing my friend ask for was that I include the phrase. . . "those who sing pray twice".


Many times when others admire my art, they want to know:
* What do you use to make your cards?
* Where do you get all the embellishments?
* How long does it take?


I only use the finest scrap booking archival acid and lignin~free papers I can find. I prefer those that best depict Victorian era wallpapers.


Choosing a floral print ~ roses are my preferred floral paper ~ and a complimentary more subtle print for a background gives the designer more flexibility. Too many patterns can be distracting from the overall appearance of the hand made card.

I purchased quality, economically priced, blank cards and envelopes in ivory. The yellowish hue appeals to the vintage appearance.


Once the background has been glued to the face of the ivory card, I then ink the edges. This instantly ages the appearance bringing about that Vintage Flair!


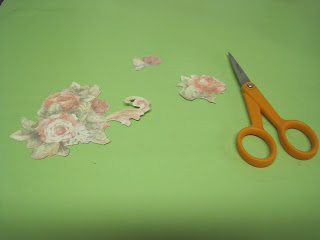
Using scrap pieces of the papers ~ I hand cut each piece to make the embellishments!


These little sharp scissors are the backbone of my designing!

Here you can begin to see the makings of cut~by~hand embellishments.

Let the designing begin!


Once the embellishments have been cut ~ by ~ hand, they are laid atop the face of the card to begin the outward appearance.


More than ample pieces are cut to ensure that once the design is put into place, the process doesn't have to start and stop, extending the length of time for the entire process. 


All the pieces tediously  cut ~ by ~ hand and laid on paper for the inking process.


Resting side ~ by  ~side, the embellishment on the left has been inked for aging.


All embellishments inked and drying before assemblage.
 While allowing the ink to dry, I print the text of the Handmade Card with a Vintage Flair. Every time I attempted to take a Calligraphy course, due to lack of enrollment, the class was canceled. Perhaps one day the opportunity will arise, until then, I use fonts from my computer.


The text in place using foam dots for three~dimensional affect, the embellishments are added layer ~ upon ~layer. Both side frames and one rose embellishment have been applied.


Layering atop of the left side frame and the already strategically placed rose, a rose cluster is adhered with more foam dots for greater dimension.


The completed face. . .with a total of seven hand cut embellishments!


This process is repeated on the right side of the inside of the card. 


Again, embellishments are added until the desired design satisfies the eye of the beholder.


The left bank of embellishments are usually more weighted in vintage design.


When looking for vintage papers, I try always to include designs with birds!


A completed right facing vintage design!
 
Now that the card is finished. . .it is placed on an easel for the completion of the drying process. I suggest a minimum of eight hours for all adhesives to dry thoroughly.


On to the envelope!


At Studio One the envelope must posses the same Handmade Card with a Vintage Flair appearance!


Most always, I use the same background on the outside of the envelope; however for this particular card and its recipient, I felt it would be too distracting.


The inside of the envelope receives as much attention to detail as the outside.

Several embellishments are added to the upper half of the interior of the envelope.


Care must be taken when placing the card inside the envelope!


The final answer. . . each Handmade Card with a Vintage Flair can take from four ~ to ~ six or more hours! Each handmade card @ Studio One is truly, a labor of love. More than a hobby. . .it is my passion!


I'm thrilled to have my friend ask me to make this Handmade Card with a Vintage Flair. . .for it is I, who am honored!

Until next time. . .